We started our journey with iOS emulation by looking at existing open-source solutions. We had successfully run alephsecurity/xnu-qemu-arm64 before, but the project being read-only was concerning.
Then we tried TrungNguyen1909/qemu-t8030 and it had quite a few interesting features:
- the ability to actually restore iOS (using a second "companion" QEMU for USB connectivity)
- running iOS 14
- a more recent version of QEMU
- a nice wiki on how to bring up the emulator
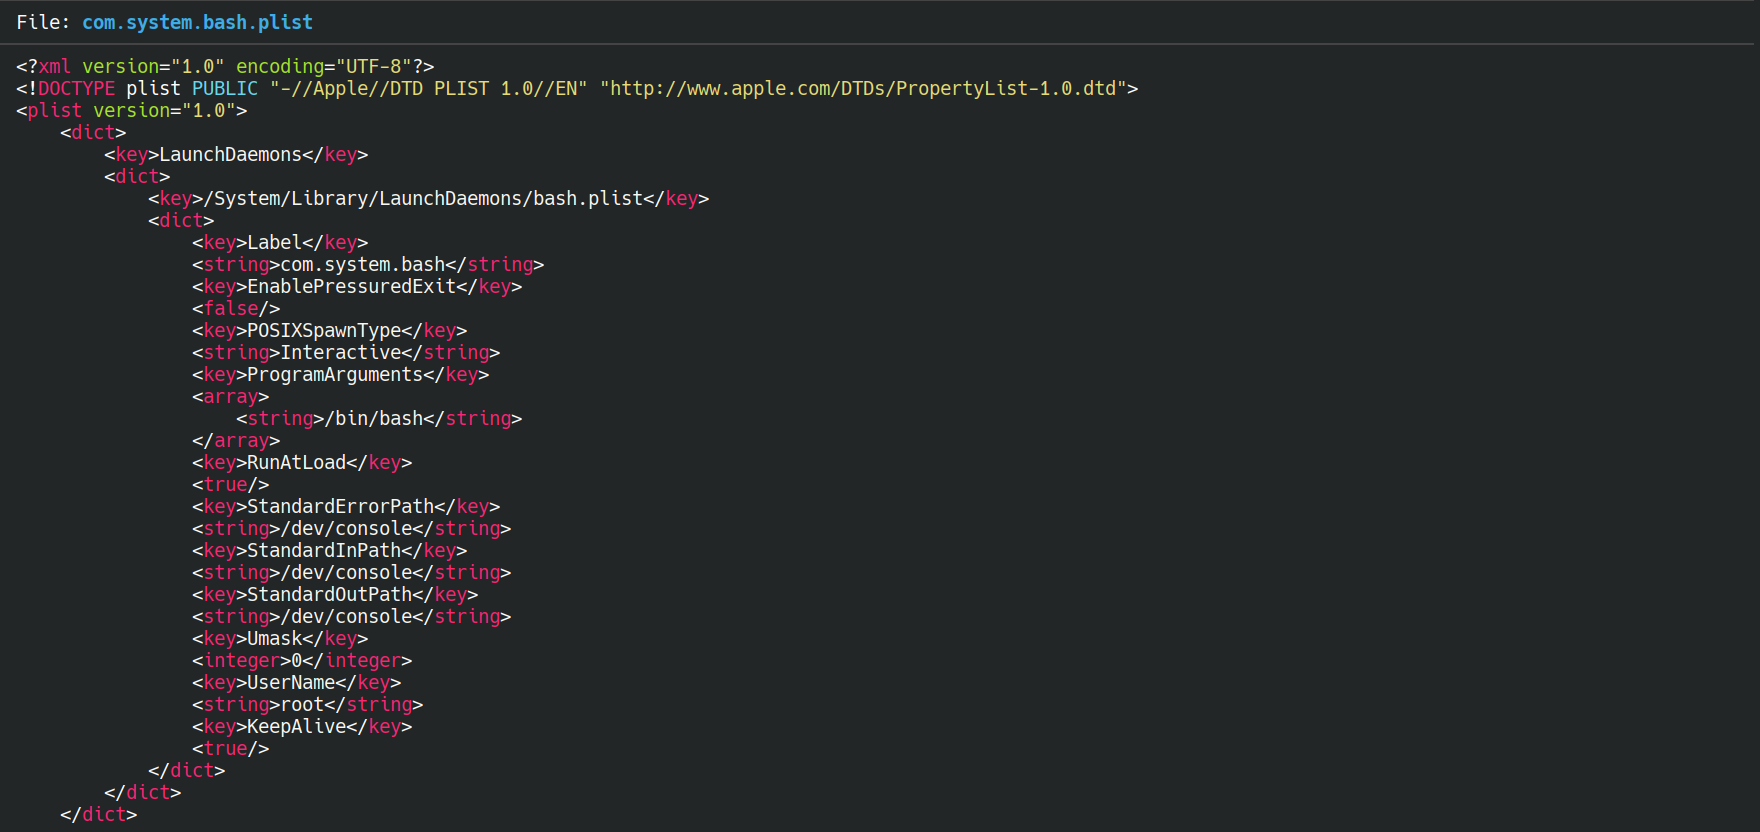
With that project, we quickly managed to get a shell and ssh by modifying System/Library/xpc/launchd.plist so it was a great starting point.
We set our long term objective on getting a functional iOS emulated, with UI and at least the ability to execute some apps.
The first thing that bothered us with the t8030 project was the fact that they added code in QEMU itself to patch the xnu kernel. We knew we were going to probably need more patching and wanted a cleaner way to do this.
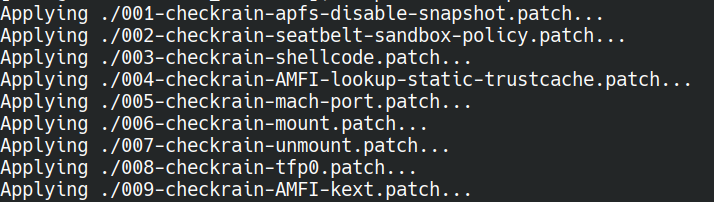
As we had some experience with a jailbroken real iPhone, we looked into using Pongo to apply checkra1n patches, as this would allow us to remove any patching done in QEMU.
In a jailbreaking scenario, after getting pwned by checkmate, PongoOS is injected in SRAM and the checkra1n-kpf module is sent through USB. Rather than bothering with early USB we chose to increase the SRAM on our emulated phone, and use PongoOS with checkra1n’s KPF module.
Executing PongoOS, first, was not without its issues, any boot code usually done by the bootrom or iboot would be missing, such as setting up the FPU before performing any double/float instructions. Skimming through ARM documentation (section 5.4) and a some Googling helped.
Features introduced with A13 and later devices, not supported by Pongo, broke the pattern-matching of some patches. For example Pointer Authentication (PAC) instructions added autda / xpacd and Apple used a different slide.
Example with the infamous task_for_pid (tfp0)
% ipsw macho info kernelcache.release.iphone10b.decompressed
000: LC_SEGMENT_64 sz=0x006d8000 off=0x00000000-0x006d8000 addr=0xfffffff007004000-0xfffffff0076dc000 r-x/r-x   __TEXT

Previous version (iphone-X (14.0_18A373_GM))
 - tfp0 address 0xfffffff0076e9e70
   0xfffffff0076e9e70 - 0ffffffff007004000 = 0x6e5e70
 - binary
   % hexdump -s 0x6e5e70 -n 8 kernelcache.release.iphone10b.decompressed
   06e5e70 7f70 07ec fff0 0017

 	Raw: 	0x0017_fff0_07ec_7f70
 	Ghidra:  0xffff_fff0_70ec_7f70

Later version (iphone-11 (14.0_18A5351d))
 - tfp0 address 0x0xfffffff0076c9e40
   0xfffffff0076c9e40 - 0ffffffff007004000 = 0x6c5e40
 - binary
   % hexdump -s 0x6c5e40 -n 8 kernelcache.research.iphone12b.decompressed
   06c5e40 1d70 00f0 307a 8010

	Raw:	0x8010_307a_00f0_1d70
	Ghidra: 0xffff_fff0_07f0_5d70

Pongo allowed us to get access to existing checkra1n patches for multiple iOS versions, and although the dynamic application was interesting, it wasn't easy to read, modify or share. We wanted a more declarative approach, just like actual code patches.
So we made tools allowing us to diff between two Mach-O, and generate a text patch file with the assembly differences. The other program would take this patch file and simply apply to a binary.
We then booted with Pongo, and used QEMU monitor to dump the memory sections patched by Pongo, then reassembled a patched kernel and finally generated a patch file with all the modifications. The big patch was then split and commented properly, allowing us to review and control exactly what was patched in the kernel.

We knew that on modern iPhones every graphical rendering ends up going through their Metal API, which then needs an actual GPU. We believed emulating the Apple Silicon GPU would be way too complex and so we had two solutions in mind:
- Use software rendering: it seemed it was possible in older versions of iOS (using the gpu=0 bootarg)
- Forwarding the Metal calls to a device capable of doing the rendering such as real iPhone or maybe a Mac with OSX
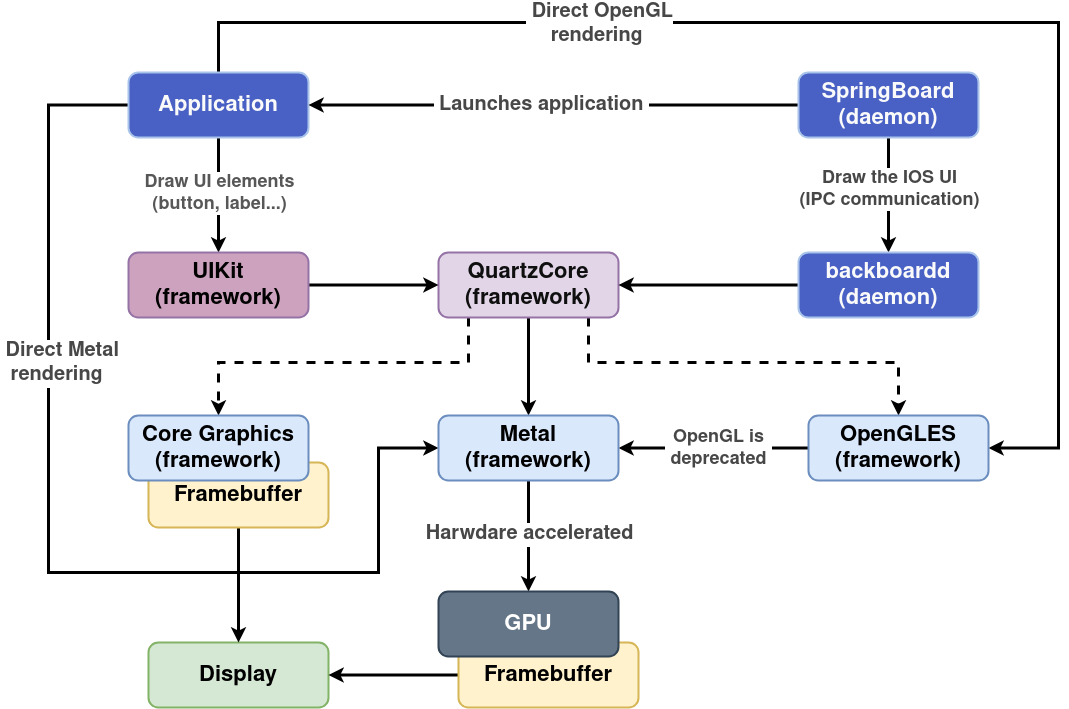
The software rendering seemed much easier, so we first looked into that. Unfortunately, the XNU kernel bootarg option was gone in iOS 14. After looking at the QuartzCore framework with Ghidra it seemed that the software rendering would only be called as a fallback if no Metal renderer was available.
In order to confirm that software rendering was indeed usable we worked on a real jailbroken iPhone, and patched Quartzcore to use software rendering. And indeed we confirmed it was possible! With these modifications, the UI was much slower, and had artifacts on parts which probably directly required Metal for rendering.

After these experiments, we knew we could get software rendering on QEMU, for anything not using Metal or OpenGL directly (so basically all UIKit apps).
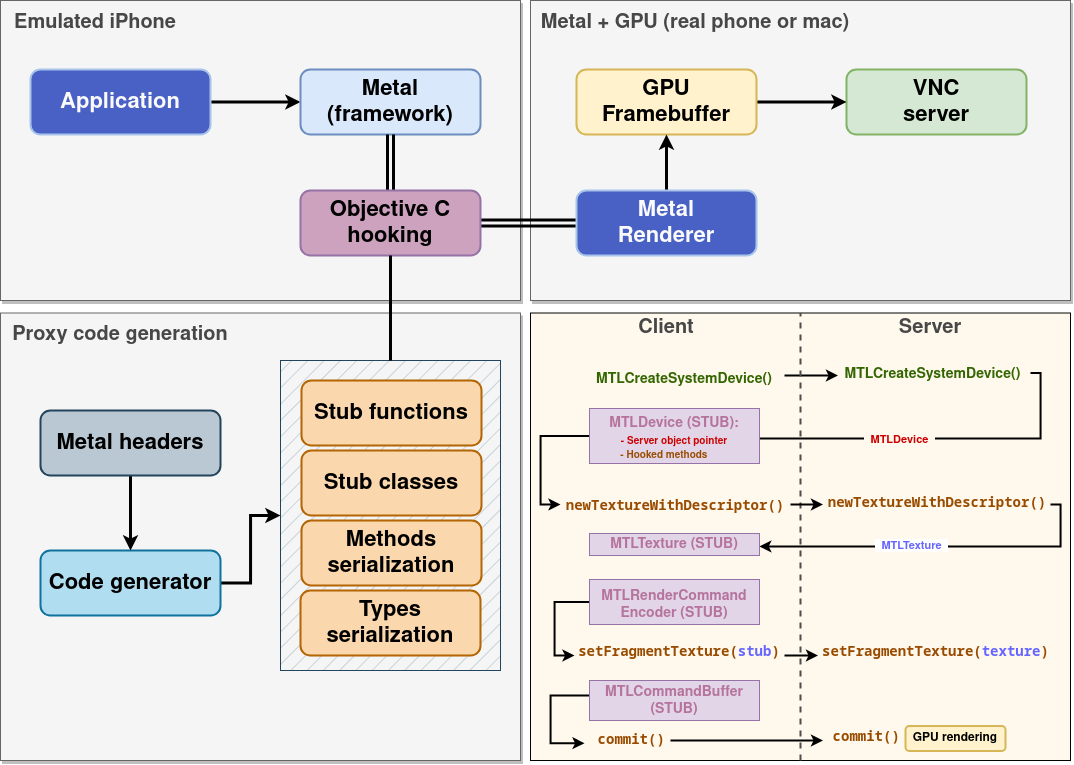
We also explored the alternative of proxying the metal calls, working with 2 physical iPhones. What we did was:
- Parse all iOS headers with LLVM
- All pointers to objective C object on the server is a stub pointer on the client
- Generate automatic code to exchange structs and pointers
- Hook all functions and methods
- Forward every call to a server, executing them and returning the result
We got some basic calls to go back and forth for Metal initialization, but we realized the road was still very long to get something to actually work. The Objetive C language and the Metal API are quite complex and have many features making this endeavor very complex.
We ended up postponing this solution for a later time and thought starting with software rendering, even though it’s more restrictive, would help us advance with other problems faster.
Furthermore, we found out, iOS frameworks actually expose private APIs not present in the public headers. Although there are some ways to parse these and generate headers, they are most of the time not usable directly and complicate things further.
After trying to make software rendering work, we decided we still needed at least a framebuffer device and the original t8030 QEMU didn’t implement one. However, we found a fork of the project which was apparently working on IOMFB support, and decided to try debugging the display with it.
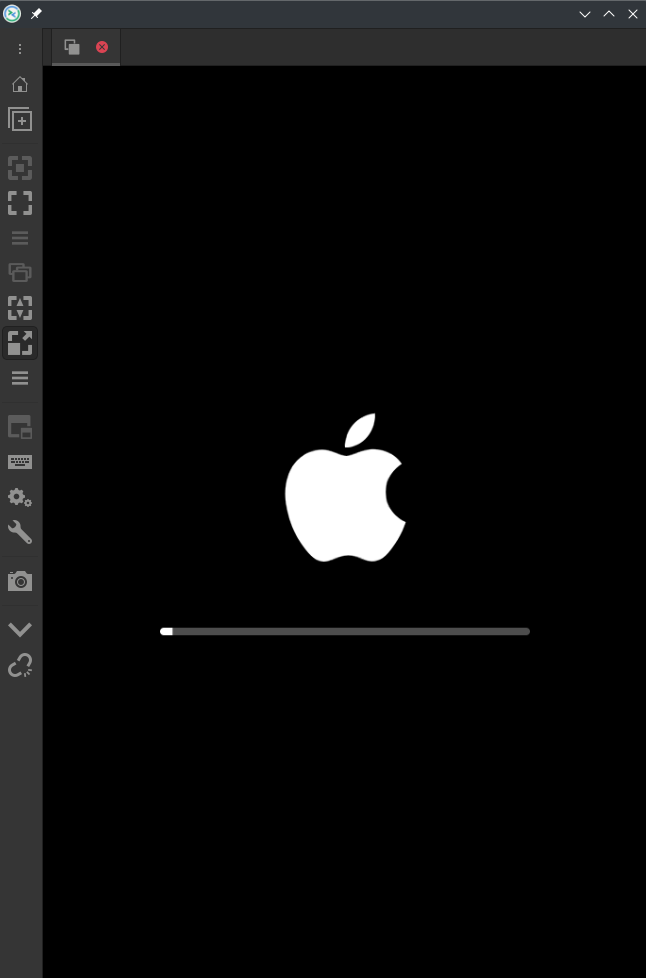
And indeed while restoring iOS with that version, we could see the Apple logo and progress bar. However on normal boot the display would remain completely black so it was time for debugging!
Looking at the IOMFB kext in Ghidra and the framebuffer implementation in QEMU, it seemed that two modes were possible:
- A raw framebuffer at fixed hardware address was available (we guessed for early display)
- A more complex API using registers to configure multiple planes and using dma to write surfaces data
We first started experimenting with the raw framebuffer (which we later found out was how Pongo displayed stuff). Using it, we could display arbitrary ARGB surfaces, but when booting, that framebuffer was never written to by the system.
Therefore, we started looking into the second display mode. By enabling traces in the framebuffer implementation in QEMU, we could see that the kernel would set up graphical planes using registers but then nothing happened.
At this point we needed to debug why nothing was displayed after boot, even though the framebuffer seemed implemented and detected by the kernel.
Even though we had SSH access, we quickly got limited on what we could observe on the running system. We needed to be able to debug the kernel and userspace components with GDB.
For the kernel randomization, it was actually set up in the t8030 board initialization and allowed to turn it off entirely, so it was easy enough.
For userland we had two cases, randomization for executables and for dynamic libraries inside the dyld cache. For executables, simply patching the _load_machfile kernel function was enough to disable it.

For the dynamic libraries we ended up handling it a bit differently. The first thing to know is that every library is contained in a big binary blob called the dyld cache (located at /System/Library/Caches/com.apple.dyld/dyld_shared_cache_arm64e).
All libraries from this cache (called frameworks) are loaded once at boot and then mapped into processes memory space, even though dlopen is called with a path on the filesystem (like /System/Library/Frameworks/QuartzCore).
We noticed that address randomization actually happened only once at boot, and then a library was always loaded by every executable at the same address later on.
So all we had to do was to write some C tool which would dlopen every framework library and then use the _dyld* functions to list the loaded images and get their offset.
Using this solution (and also the reverse process while debugging with addresses coming from GDB), we could easily debug any library from the dyld cache. We were particularly interested with the IOMFB kext, the backboardd and SpringBoard daemons and the QuartzCore framework.


debugserver localhost:1111 –attach backboardd
iproxy 1111:1111
gdb-multiarch -x "set architecture arch" -x "target remote localhost:1111"
Note2: we later found out how to disable the dyld cache by patching the kernel. Doing so allows to get look for virtual address directly in the dyld cache on the host (which we did using the great object Rust library from the Gimli project).
Note1: to debug userspace you need to have a gdb server on the guest (see the debugserver package from Procursus for example). We started using gdb on the host but it’s somehow limited or bugged, and lldb seemed better.
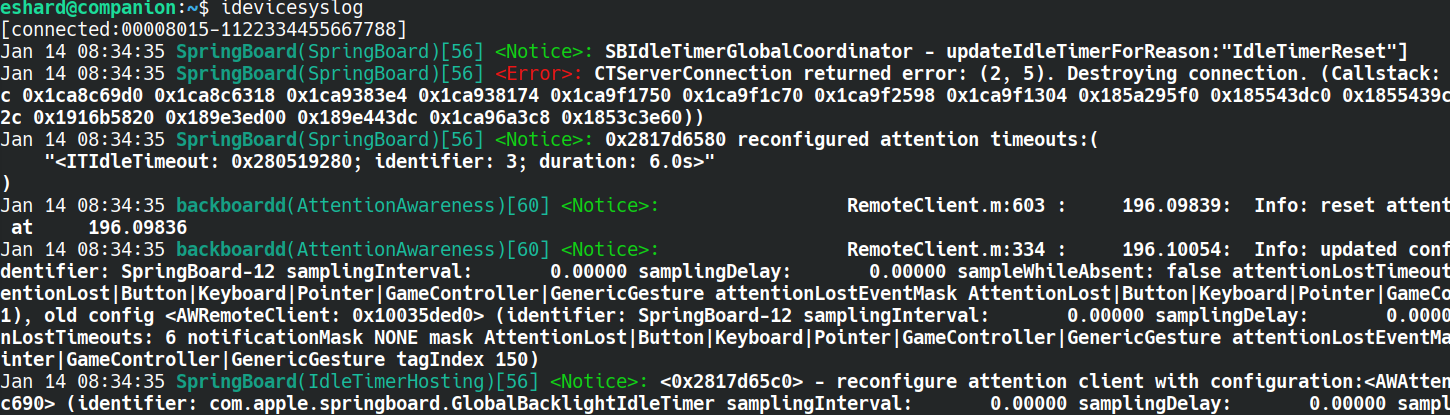
Armed with a working GDB we could see that backboardd appeared to be starting properly, but we realized system logs would be a great help to know what was or wasn’t happening.
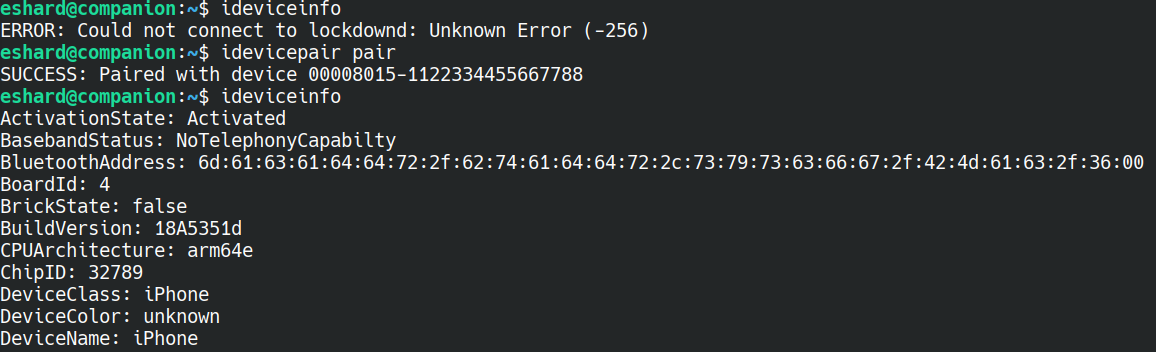
On a real iPhone, you can get the system logs (after pairing with you computer in USB) with the tool idevicesyslog. This pairing process involves the generation of key pair with the private key being stored on the phone. lockdownd uses this to verify the identity of the computer (after the user has authorized it once in the UI).
In our case, although we could interact with the phone through USB, lockdownd would not work properly. After some Ghidra sessions we realized that lockdownd was trying to use the keybag to store the private key, which would require the SEP we are lacking.
In order to go further, we created a shellcode injected in place of some presumably useless existing function. The code reads a pre-generated pair of private/public keys from the filesystem, and basically loads them every time lockdownd tries to get them from the keybag.
After much debugging (and some more patching to simulate the user trusting the computer and the phone being unlocked), we finally got it to work, and could pair with the emulated iPhone from our companion QEMU.
We found out later on you can also use a tool called oslog on the iphone directly to show the logs (didn’t seem to work at the time), although having the ability would give us much more than just the logs afterwards.
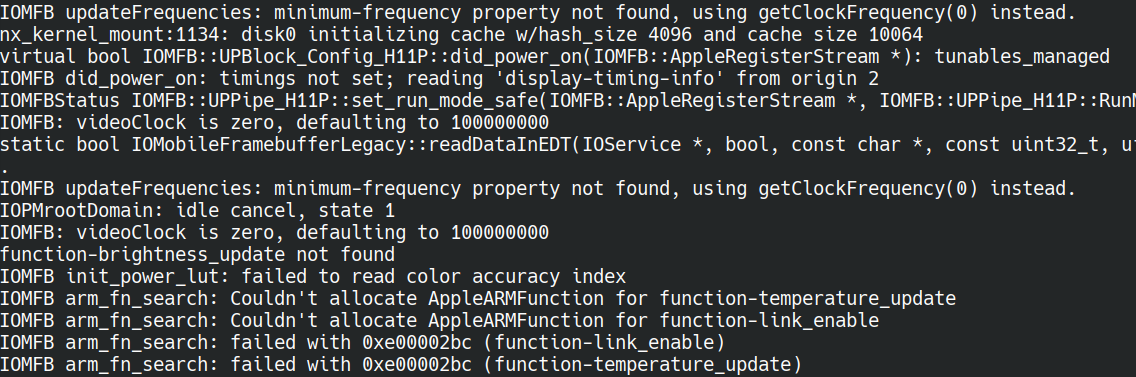
Unfortunately, the logs revealed that QuartzCore seemed to be initializing properly, detecting the size of the display. It also showed that software rendering was being used as a fallback. So everything was working properly but still no display!
Note: a single error about pixel format was showing and we worked around it by forcing RGBA (we’ll talk later about patching userspace), although this was removed later on.
Modifying backboardd to fix a pixel format error showed us we were going to have issues with multiple aspects of iOS security.
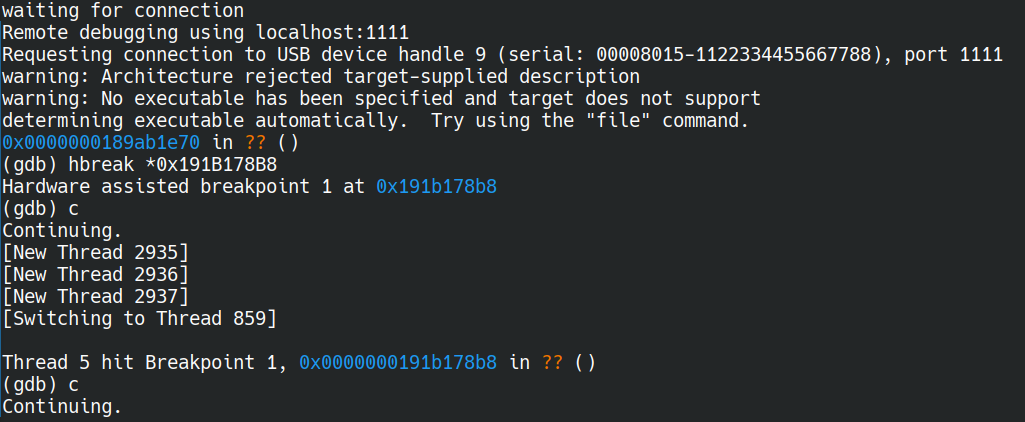
The signature check at load and runtime were fixed with kernel patches, however we still had issues with pointer authentication failure interrupting our modified backboardd execution.
Pointer authentication is a feature added with ARM8.3 which is used on the t8030 board we were emulating and not on t8015 which we used before, so this was new to us.
Since we had foreseen a lot more patching in the future, we decided to tackle that issue at that moment, and try to find a way to bypass this to make our life easier.

At the time, we first thought we could just replace all the PAC instructions with either NOP or equivalent non PAC instructions.
Although this would have probably worked, it was a bit invasive and we later found out that you can build an ARM64 PAC binary two ways:
- Either use a dedicated PAC instruction set, which can only be executed on ARM8.3+ CPU
- Or an “unused” instruction set which will be interpreted as PAC on ARM8.3+ or non and non PAC equivalent on earlier ARM versions
After running some tests with buildroot and an ARM64 linux system, we verified this to be true and also verified that the binaries compiled for our t8030, used the backward compatible instruction set (architecture called arm64e).
So basically, all we had to do was to disable PAC enforcing in QEMU, and it would just run like non PAC code. Unfortunately this didn’t work, and at the time we were using QEMU 7, and found out that QEMU 8 didn’t have the same behavior.
So we did the natural thing, and started porting the current code base to QEMU 8.2.1. This was painful as a lot of code modified QEMU generic code, particularly the code handling the apple specific instructions genter/gexit and the GL exception levels.
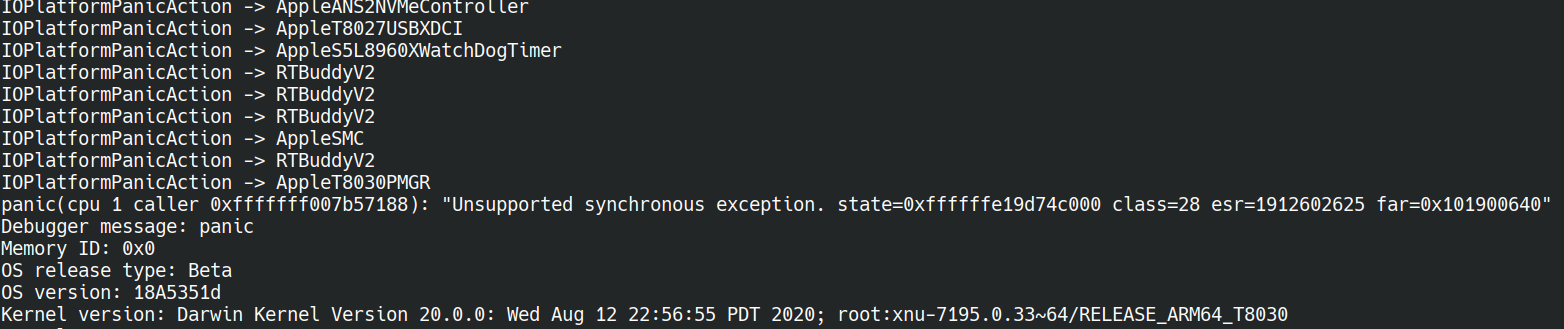
After countless xnu panics, gdb attaching to the kernel, gdb attaching to qemu itself, and a desperate git bisect to find our last bug, we finally got iOS booting again on QEMU 8! And with it, the ability to disable PAC, and modify any executable code, anywhere as we want it.
Since backboardd appeared to be working properly in the system logs, we had no choice but to dig further into backboard behavior to try and understand why it still wasn’t displaying anything.
Writing raw ARGB frames on these addresses allowed us to actually modify the display and write on the different graphical planes, so we knew that the display part was actually working properly.
We were left with a few possibilities, either:
backboarddwas not writing anything for some reason- or it wasn’t writing at the proper addresses
- or what was written was not valid
To investigate, we started by trying to dump physical DMA memory, where backboardd was supposed to write, maybe it was written to but not displayed properly.
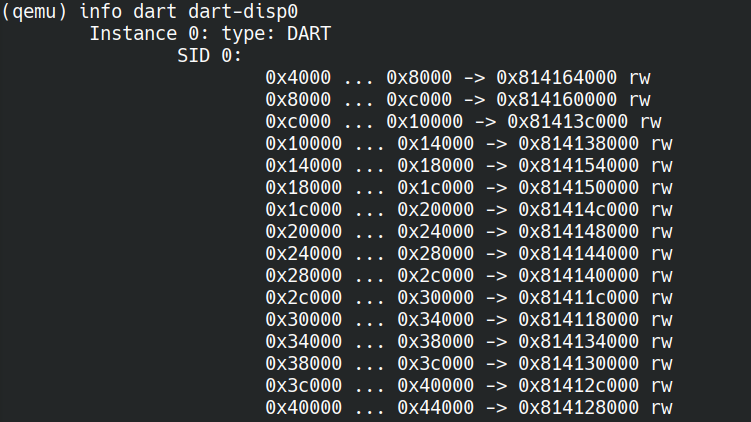
To do this, we used a QEMU monitor to get the non contiguous addresses, and then a crude script to dump the physical memory and merge it all in a single file.
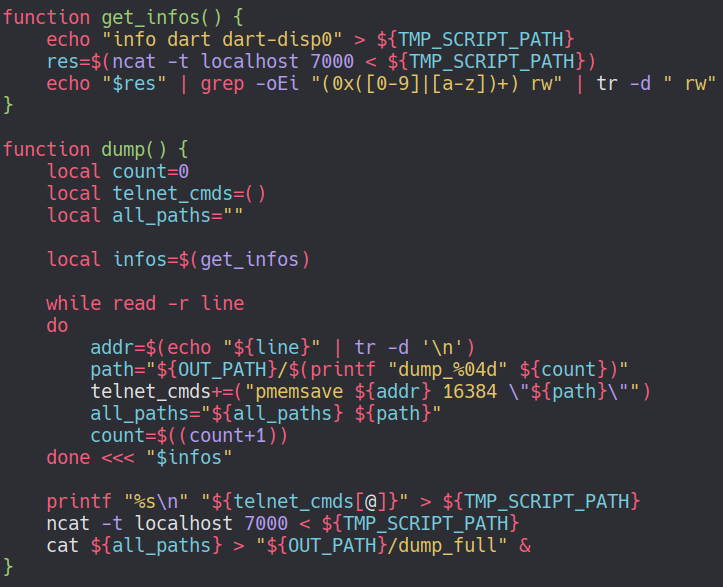
Finally using ffplay we tried interpreting that data as an ARGB frame but unfortunately we didn’t get anything interesting.
The second idea was to play with the surfaces allocated by iOS, getting the mapped address in backboardd memory with GDB (by breaking in iosurface_lock).
Searching for all these addresses for some clue, even though we had no idea what was being displayed or if something was even supposed to be displayed. We sometimes found strange things shaped apple an logo, but clearly something was wrong about the way the frames were being written.

We did the same thing on a real iPhone 10, and we easily dumped perfect raw ARGB frames of the current display. It turned out that with iPhone 11 (so t8030) and later, surfaces appear to be passed compressed to the GPU which knows how to handle it.
But since this doesn’t happen on iPhone X (t8015), we tried modifying the DTB in the QEMU to pass 8015 as chip-id instead of 8030. And finally, we got some apple logo showing on screen after the boot!
At this point, we were happy to finally get a logo displayed but that’s all it did, and the system logs were quite verbose with many system daemons and different libraries we didn’t know about.
All we could do at this point is guess which of the many errors shown in the logs were related to the current issue and fix them one by one until the behavior of the UI changed.
We noticed issues about user authentication and found the errors originated from the daemon mobileactivationd and the framework SpringBoardFoundation.
After patching these, the UI started to display a white progress bar similar to what is shown during the restore phase. The bar seemed to progress indeed but seemed stuck at 90% even after waiting for hours :\
Patching the userspace and the framework of the dyld cache was made possible by disabling address randomization. The same way we patched the kernel, we created textual patch files split for each binary / library that we applied with our internal tools.
However, we quickly realized we were going to patch the dyld cache quite often, and while trying modifications it was very painful to handle the 2GB binary file.
Patching it directly was not realistic, we all work on Linux so we cannot modify the nvme directly, and copying the 2GB back and forth through SSH would take forever.
So what we did was to update our internal diffing/patching tool to work with dyld, search the offset of the framework in the dyld cache blob.
Furthermore, we added an option to allow generating simple “dd” commands (and their revert), which can be applied directly on the iPhone (after remounting the fs in rw).
This method allowed us to test many iterations of modifications, and only required a reboot of iOS to have modifications of the dyld cache taken into account.
Note: a few extra modifications of signature checks in the kernel were necessary for these to work.
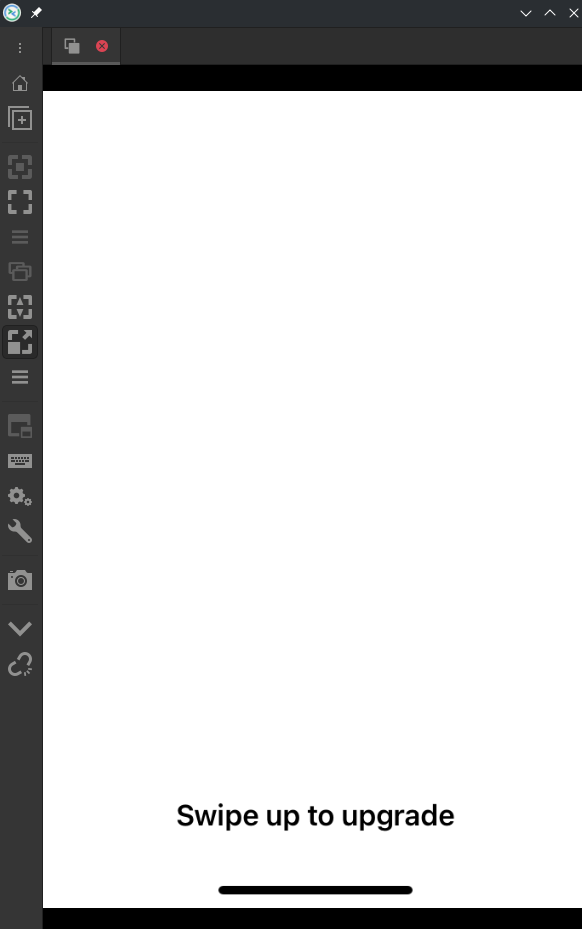
Before finding out how to fix the stuck progress bar, we had a little experiment with a system process called PreBoard. It appears to be normally only shown to the user if something goes wrong (like an update interrupting).
Because it’s a system application which draws directly using backboardd (just like SpringBoard would do), it can be started directly from the command line. And with it we get a white screen asking us to swipe to upgrade!
Armed with knowledge of a past project about using a VNC server on a physical iPhone, we tried adding it, and after quite a few failed attempts, managed to actually unlock that white screen (not by swiping but with a keyboard key).
Right after unlocking, QEMU would stop the execution because iOS was apparently using an illegal instruction. After some digging into backboardd, we found out that it uses the vImage framework to do some hardware accelerated graphical operations (like _vHorizontal_Scale_ARGB_8888_Accelerate).
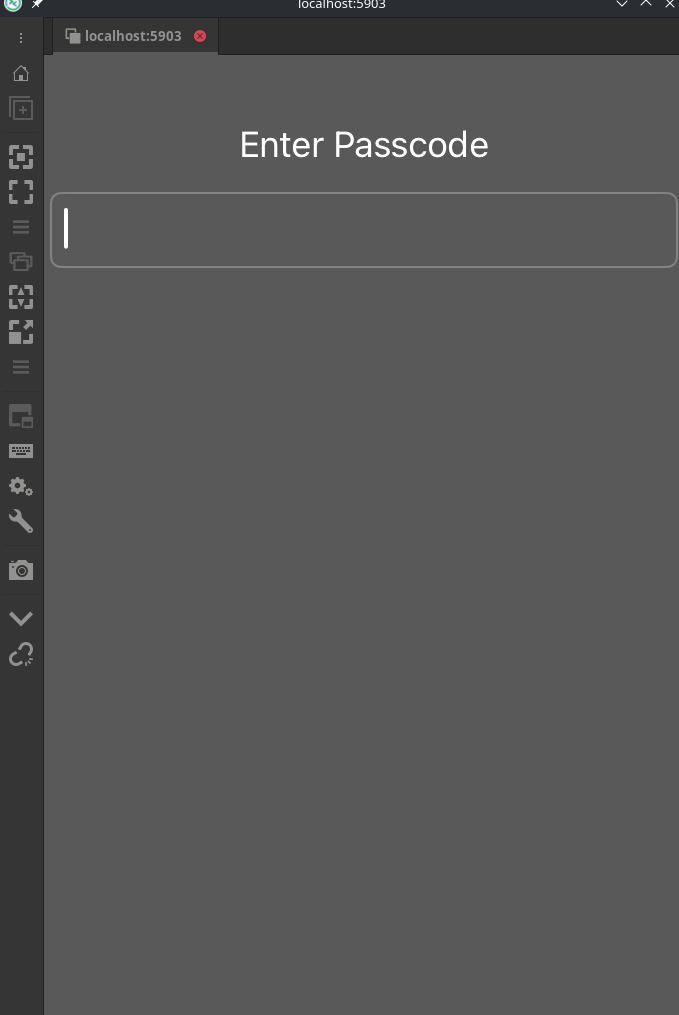
These operations rely on AMX (Apple Matrix Coprocessor) which have a set of proprietary instructions which are not implemented in the emulated ARM CPU running in QEMU. Fortunately, the vImage framework provides alternative software versions for these calls which only use generic ARM instructions, so we did yet again some patching.
The result is a new screen with an actual IOKit window asking us to enter the passcod and working textbox, in which we can type with the VNC injected keyboard events.
At this point we knew everything was ready for SpringBoard to display properly and it was only a matter of time before we got it to start.