This is the first of two posts about a renderer I have been developing, focusing on what I’ve built and how it works. The second post discusses why I’ve built it and my plans for the future.
I’ve been developing a custom real-time renderer which uses very small voxels to produce a distinctive visual style that modernizes the look and feel of classic 90’s 3D games. By approaching the problem of rendering voxels in an unusual way, I’m able to produce these visuals from conventional art assets — low-poly triangle meshes and textures — that are familiar and efficient to create.
Before going further, a video is worth a thousand words. (Set quality to 1440p and view full-screen for best results.)
Read on for more information about the chosen visual style, how I approach it at a technical level, what this means for creating art assets and environments, and where I’m going from here.
Aesthetic motivation
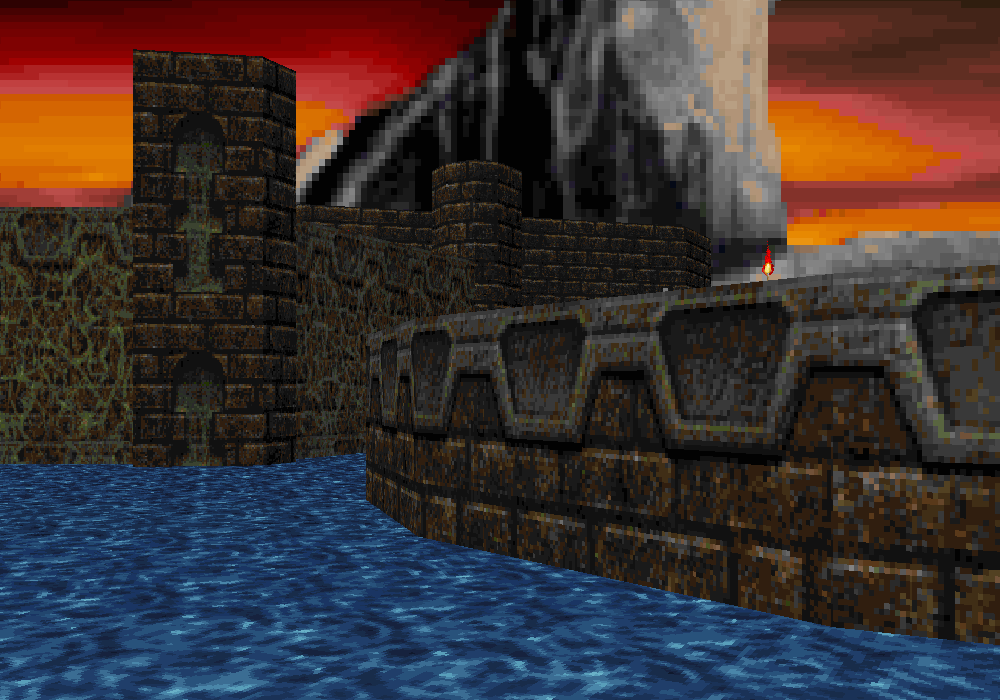
Early-to-mid 90’s 3D games like Doom, Quake, and Duke Nukem were immensely influential for their technology and gameplay. More recently, the limitations of their visuals have taken on a retro appeal. Environment geometry was simple and imaginative, and textures were displayed with sharp pixel boundaries. I see this as 3D’s counterpart to the stylized abstraction of 2D pixel art. This has become a popular aesthetic for modern retro-inspired games, and 3D indie titles more broadly.
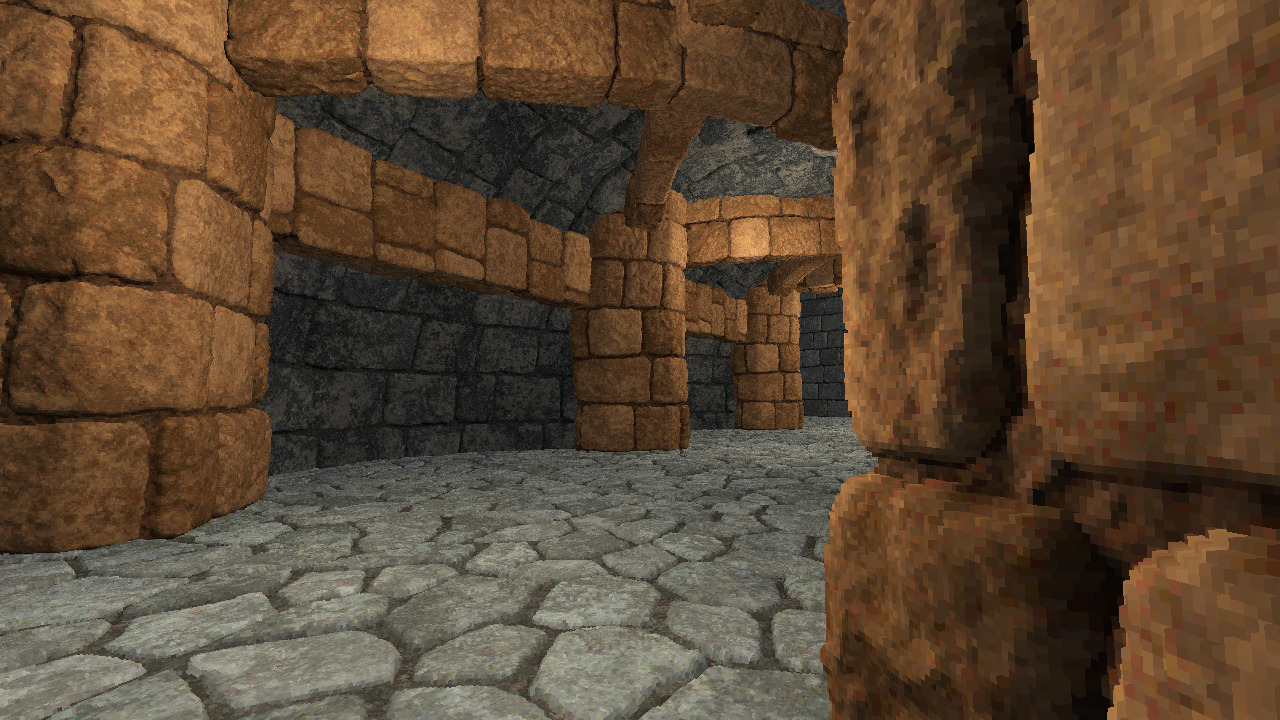
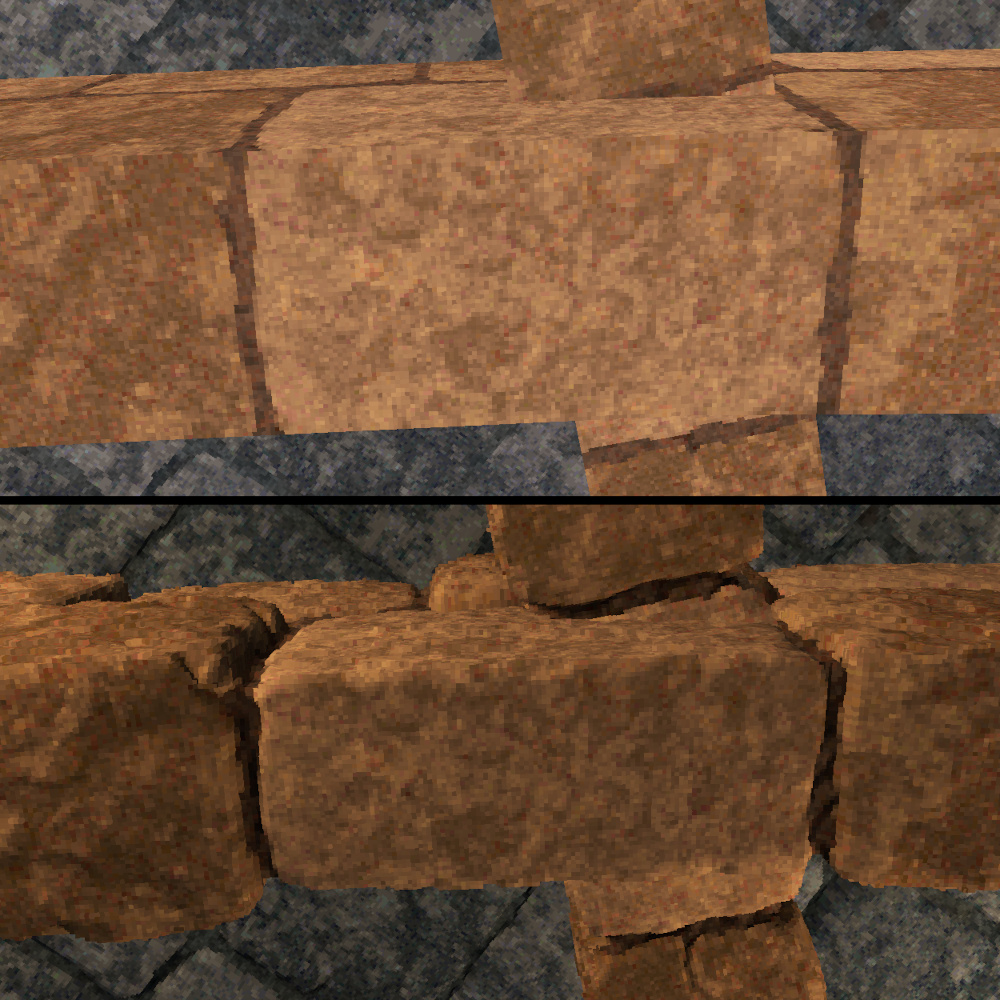
I started this work with a simple question: what if, instead of blocky two-dimensional details, the surfaces in these environments had blocky three-dimensional details — voxels, instead of pixels? For example, a cobblestone wall could pop with geometric depth while retaining a pixelated look when viewed up close.
As I fleshed out this idea and built the renderer you see in the video, I aimed for the visuals to have a foot in both worlds between the look of 90’s games and something more modern. To put it another way: this is what Doom looked like to me when I was young.
How voxels usually work
Before getting into how I model and render this voxel aesthetic, it’s worth reviewing how voxels are typically used in games, and some of the consequences this has. (Or, skip ahead to “what I’ve built.”)
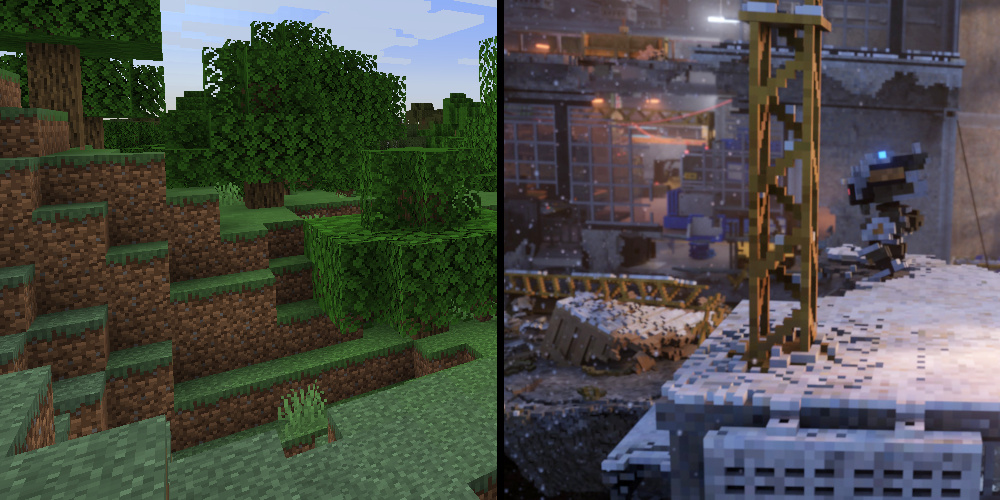
A voxel mesh is a three-dimensional grid where every cube-shaped cell is filled in or empty. These cubes may be large and textured, like in Minecraft, or small and solid-colored, like in Teardown1. To build a large environment with voxels, you can place all the geometry on a shared grid (Minecraft), or position many independent voxel meshes into the same space (Teardown). Regardless, once you decide your game world will be formed with voxels, you have to create this voxel geometry, and your rendering and gameplay logic needs to operate in terms of voxels.
Software exists to author voxel meshes directly, but the process is time-consuming and often limited to creating smaller meshes. You can create larger environments by modeling building blocks, like tileable sections of wall or floor, and assembling them into larger structures. This works well for grid-aligned buildings but poorly for free-flowing terrain.
Many voxel games instead opt for procedural generation, which works great for natural environments and can be used to combine building blocks like the ones mentioned above automatically. But procedural generation brings its own headaches, and is only suitable for certain kinds of games.
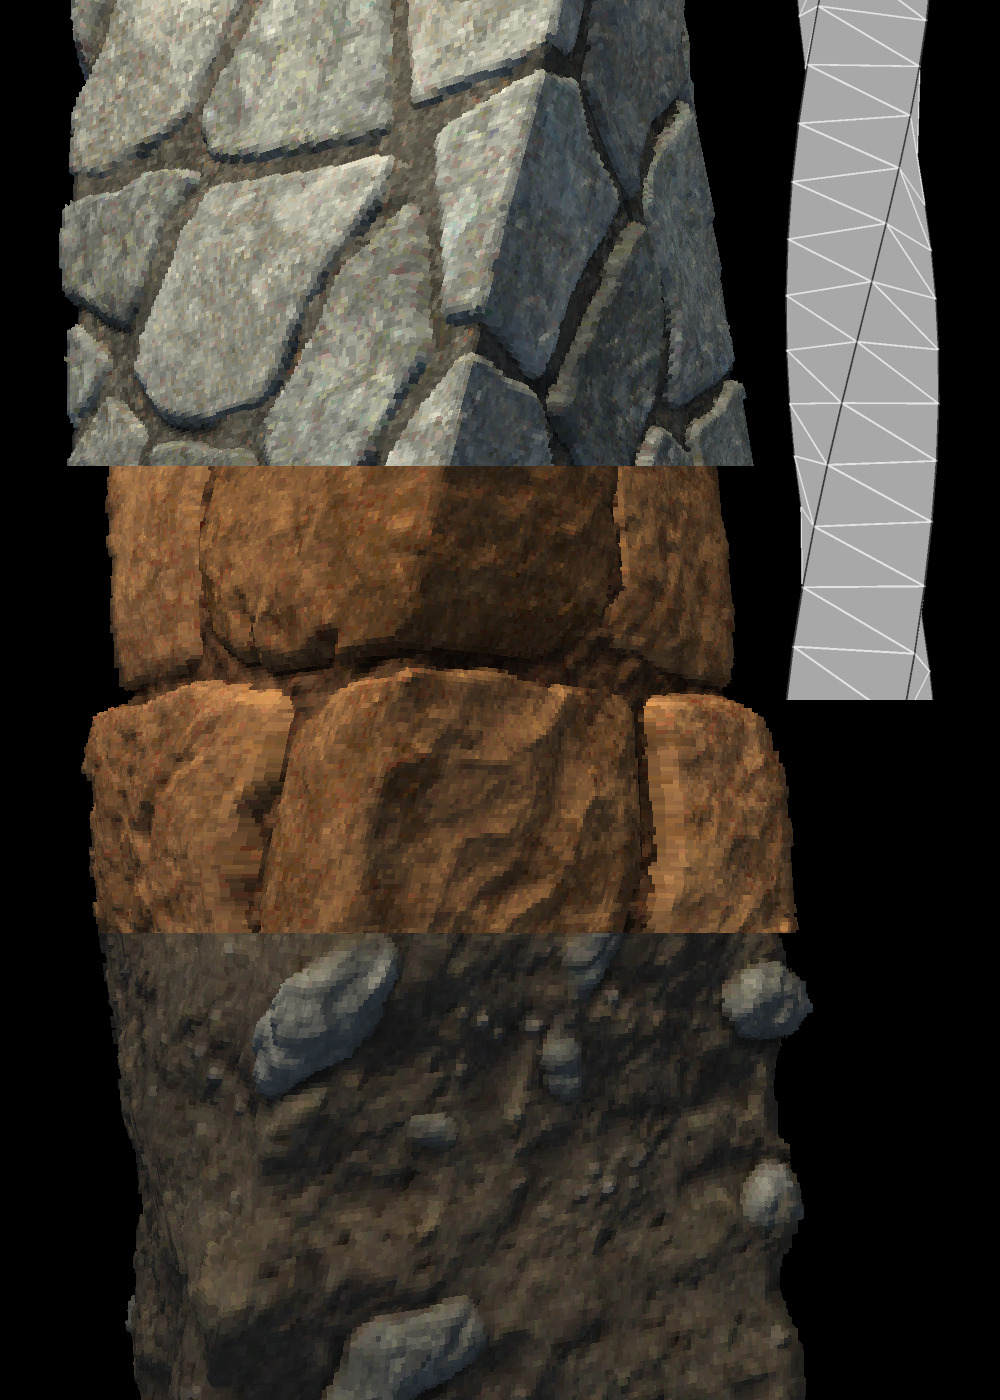
It’s also possible to create voxel geometry by modeling the object or terrain that you want as a conventional triangle mesh and then rasterizing it to a voxel grid. This is a powerful technique, though it does mean that all the resulting geometry occupies a single voxel grid, which may not be desirable aesthetically. For example, if one face in the triangle mesh is axis-aligned and another is at a 45-degree angle, the first face will become a flat slab of voxels, while the second will look like a staircase.
Whatever method you use to create your voxel geometry, because your scene is canonically represented in terms of voxels, your rendering and game logic need to operate at the voxel level. Especially if the voxels are small, this may mean having to implement your own physics, character controller, NPC pathfinding, etc., as well as rendering.
On the plus side, it’s easy to add or remove geometry from voxel meshes; games like Minecraft and Teardown take full advantage of this strength.
How displacement usually works
In my case, I simply want to add voxel-like surface detailing to the kinds of environments found in classic 3D games. Those environments consist of largely static, texture-mapped triangle meshes. So what about solving the problem with displacement mapping?
For folks who aren’t familiar with it, displacement mapping pairs your textures with displacement maps that define how far each pixel of the texture should extend inwards or outwards from the surface of the mesh. This can be a very fast way for artists to add detail to geometry.
3D modeling software can apply displacement maps to geometry by subdividing the mesh and then displacing the new vertices, so the displacement from the texture becomes real geometry, even affecting the silhouette of the object. The resulting meshes have radically higher polygon counts, however, and input meshes that have hard edges or corners must be modified to produce good results.
For real-time graphics, displacement maps are sometimes used with surface shading effects like parallax occlusion mapping to create the appearance of fine geometric details on meshes without actually changing their physical shape. These effects can look good on large floors and walls, but the illusion breaks down along the edges of objects, where the geometry remains flat2.
A method known as shell mapping provides something of a middle ground between the two approaches above, making it possible to see displacement even along the silhouette of an object without having to form a highly subdivided mesh. However, it struggles with areas where the input mesh has high curvature3; this makes it hard to adapt input meshes that have hard edges or corners for use with the technique.
What I’ve built — mixing voxels and displacement mapping
For my purposes, I wanted to use conventional low-poly meshes to model environments like those of classic 3D games, apply displacement maps to define voxel-scale surface details, and render a result that truly looks like it was built from voxels. These environments are full of sharp edges, like the corner of a building. Conventional displacement mapping already struggles with these regions; in my case, I also wanted the results to look like voxels.
Solving this problem was very, very hard, and involved building a lot of custom machinery. (For now, this is a standalone C++ / Vulkan project; more about that below.) This infrastructure performs three main tasks:
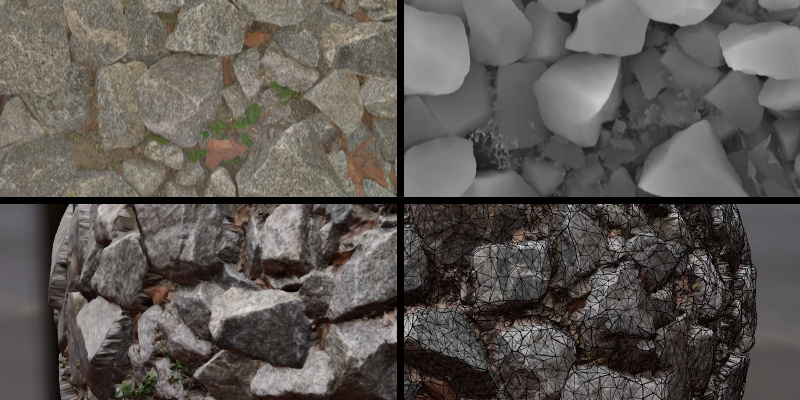
- Taking the triangle meshes that define the environment, plus limited information about the displacement maps, and converting them into the geometry data that the renderer will load onto the GPU to draw the displaced versions of the meshes4. This process runs on the CPU before any frames have been rendered. In a shipped game, you could bake the results to disk, though this isn’t too expensive; for the demo environment in the video, converting the entire scene on a single thread takes half a second.
- Pre-processing the textures to generate other information needed during rendering, such as normal maps. This work is pretty basic, but it is slow, so you’d definitely bake the results.
- Using the mesh and texture state generated above to draw the voxel-displacement geometry. This happens on the GPU with almost no CPU involvement per frame.
While there’s room for further optimization, it already performs well: on a Radeon RX 5700 XT (which was considered a 1440p card when it launched in 2019), the demo sequence seen in the YouTube video renders at 1440p with frame times from 4 to 9 ms (250 to 110 FPS). On a Steam Deck OLED at its native 800p, the sequence stays above 60 FPS, with many areas locked at 90.
Creating art assets and environments
So, the tech exists; what does it look like to make content for it? There are two kinds of assets to create: textures and meshes.
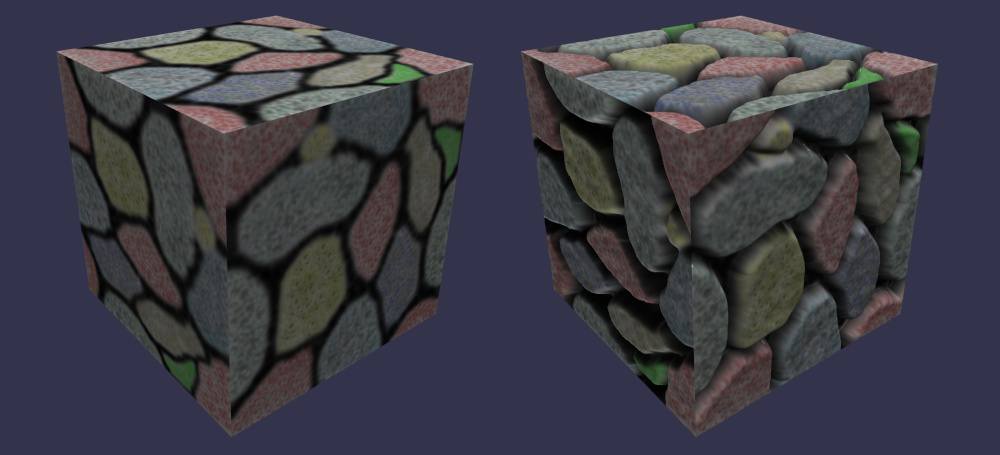
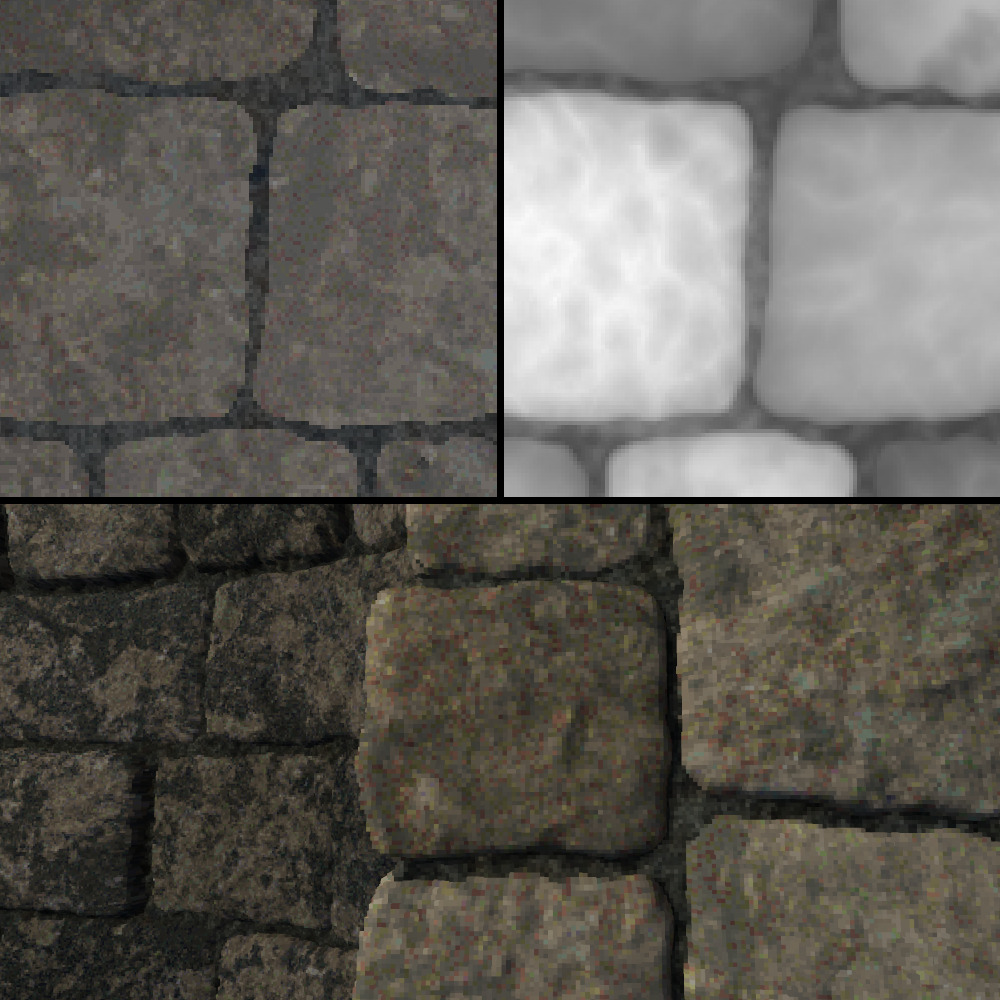
I author each texture as an albedo map and a displacement map. For the albedo, I’ve found that imitating the limited palette of retro games helps to sell the visual style. The displacement maps look very standard, providing fine-grained height values that you can rescale in the renderer to make the displacement more or less intense. In this case, the units for the rescaled height values are how many voxels inward or outward to move the surface. The renderer only displaces to the nearest whole number of voxels, but it uses the exact heights to calculate a normal map, so that features less than a voxel tall can still affect the lighting.
Next are the meshes. These are conventional low-poly texture-mapped triangle meshes with shading normals. The normals indicate which sections of the mesh represent smoothly curving surfaces and which edges are supposed to be sharp; as mentioned above, my renderer has to do extra work for sharp edges to produce good-looking results. For the sake of the visual style, I try to keep the size of the voxels consistent when mapping the textures, but this isn’t a hard requirement.
There are limitations on how you structure the meshes and how you map the textures to them. Some of these limitations I can remove in the future, and others are unavoidable because of how the renderer works5. That said, because these are triangle meshes, not some purpose-built geometric representation, it’s possible to use many different tools to create them. I’ve used Blender to model my demo environment, but to illustrate the point, the current export format from Blender to my demo is literally just an OBJ file.
Benefits of this approach
Approaching the voxel aesthetic in this way has some noteworthy benefits. As described above, you get to use a familiar workflow to create content, rather than having to use specialized voxel-editing software. Authoring good textures can be challenging (at least for me), but once you’ve done so, they’re easy to reuse across a range of geometry without having to do further voxel-scale work. For example, a large fraction of the demo geometry in the video uses a single texture (the stone blocks, in three different colors).
So far, what I’ve been building is just a demo of a renderer. But some of the most interesting consequences of solving the problem this way go beyond rendering to the other components of a game. Because the environment is authored as triangle meshes, with the voxel features being only surface decoration, you can treat the environment as being polygonal geometry whenever it’s convenient to do so.
In my demo application, you can move around the environment from a first-person perspective with full collision, walking up stairs and being blocked by walls, but I didn’t have to write my own physics engine or character controller; I integrated an open-source physics library and simply used the original triangle meshes as the collision geometry. Similarly, problems like enemy movement and pathing could be solved in terms of the same meshes. Only select gameplay systems would need to care about the voxels; for example, in a first person shooter, you could implement a displacement-aware raycast function so that bullets can respect the exact shapes of the displaced geometry.
Many voxel-based games use their own engines, because so many gameplay systems have to be customized. This project is currently a standalone codebase using C++ and Vulkan, but as I’ve argued, most of the logic outside of rendering doesn’t need to know or care about the voxel-scale details. As a result, I think the most realistic path to using this rendering technique in a game would be to integrate it into an existing engine to benefit from all the other provided systems. But that’s getting into the topic of the next post.
Where this goes from here
So, where am I going from here?
For the renderer itself, there are several features I’d like to add or improve. What I’ve built so far is a great way to create level geometry, but game environments also feature smaller objects, decorations, and dynamic elements like enemies. I have ideas for how to integrate smaller or animated objects into this art style in the future. While the lighting in the demo already looks good, the current implementation is limited to a small number of lights, and lacks shadows, ambient occlusion, or other fancier features. Because this renderer is meant for the largely static environments that most games have, rather than the highly dynamic geometry of typical voxel games, there’s a lot of flexibility to handle lighting in different ways (including baked approaches), depending on the needs of a particular application. The renderer currently has no anti-aliasing, which becomes noticeable on distant floors in particular; there are some interesting possibilities for dealing with this.
Zooming out further: where does this project go? What am I planning to do with it? For more on that, especially if you’re a developer or studio who finds this work intriguing, please see the second post. And thank you for reading!